Parental Note: This experiment is geared towards ages 9 and up.
Additional Note: This experiment will take about an hour to complete. Children may need assistance with using an X-acto knife.
Experiment Overview:
When you think of light, you probably think of the color yellow—like the light that comes from a light bulb or the colors of the sun. In reality, the spectrum of visible light has many wavelengths, which appear as different colors! The light we can see with the human eye starts with the shortest wavelength, which is violet, while red has the longest wavelength. There is also the light that you can’t see. We call these ultraviolet and infrared light.
Scientists in the 1800s designed an instrument, called a spectroscope, that can be used to split beams of light into individual wavelengths, allowing you to see the many colors they produce. These early instruments bent light through a glass prism in the same way that light bends and split when it passes through water droplets to form a rainbow in the sky. Today’s spectroscopes work a bit differently. Light passes through a narrow slit, which spreads the light out into different wavelengths, making it possible to measure each one. This process is called a diffraction grating.
When atoms, the building blocks of all living things, are excited by an energy source (such as an electric current), they glow with a unique color spectrum. Diffraction grating spectroscopes are used by scientists today to look at the different wavelengths of light emitted by the atoms of different elements. This can help them identify the chemical makeup of molecules in unknown substances.
These fancy instruments are not just for professional scientists. You can use one too! In this experiment, you will build your own diffraction grating spectroscope to observe different wavelengths of light.
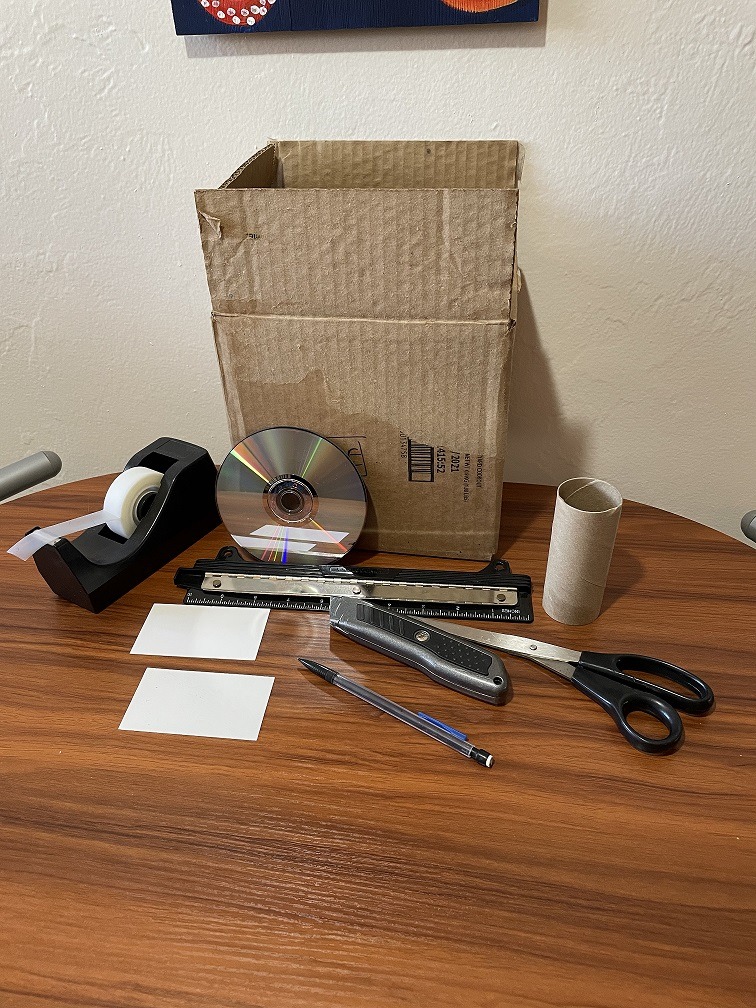
Experiment Materials:
- A cardboard box large enough to fit a CD
- A DVD or CD
- One or two business cards/3×5 inch cards
- A cardboard toilet paper tube
- Aluminum foil and glue
- Scissors or X-acto knife
- Cellophane tape
- Pen/pencil/marker
- Ruler
Experiment Process:

Step 1
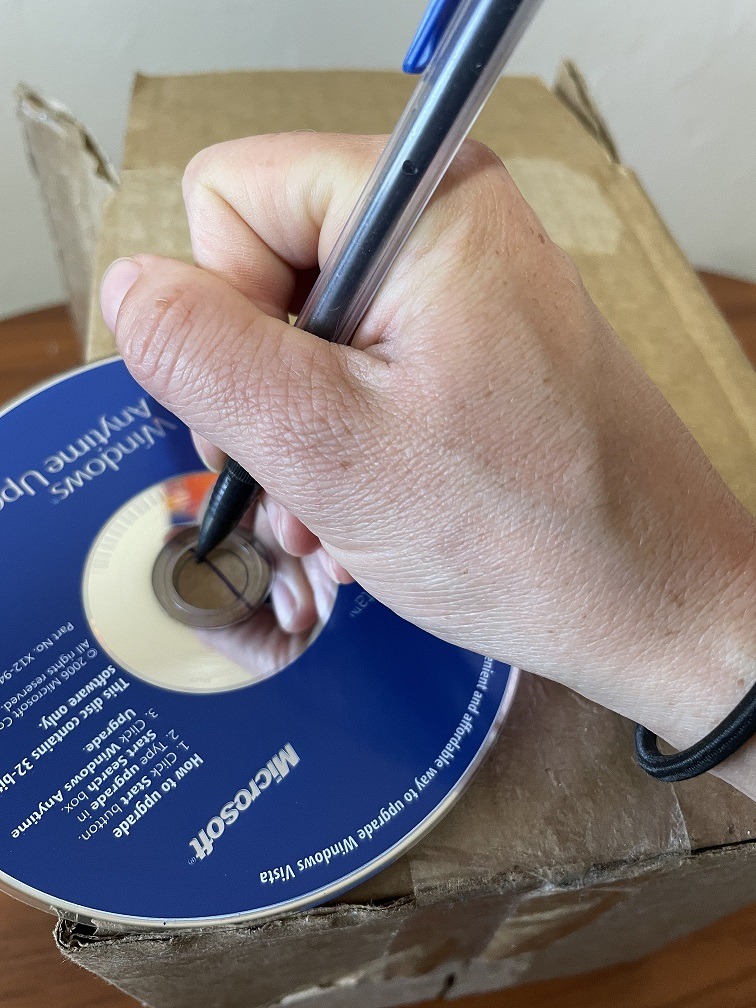
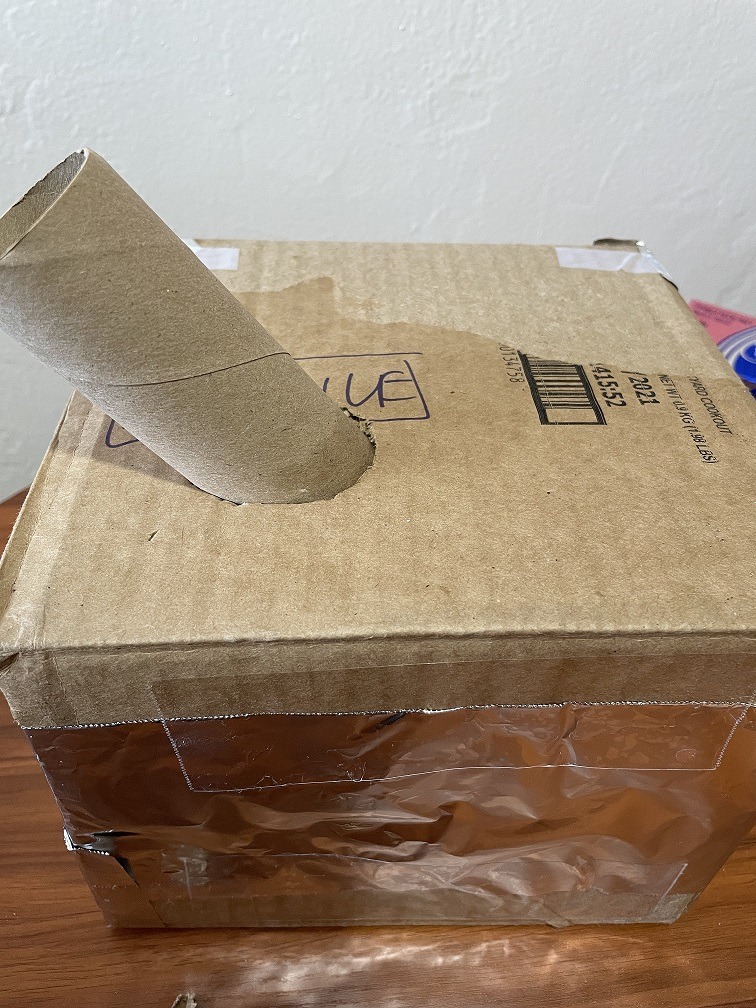
Make a hole in the box for the viewing tube. Set the CD on top of the box, about a half an inch from the left edge on the side you want to place your tube. Use a pen or pencil to trace the circle within the middle of the CD.
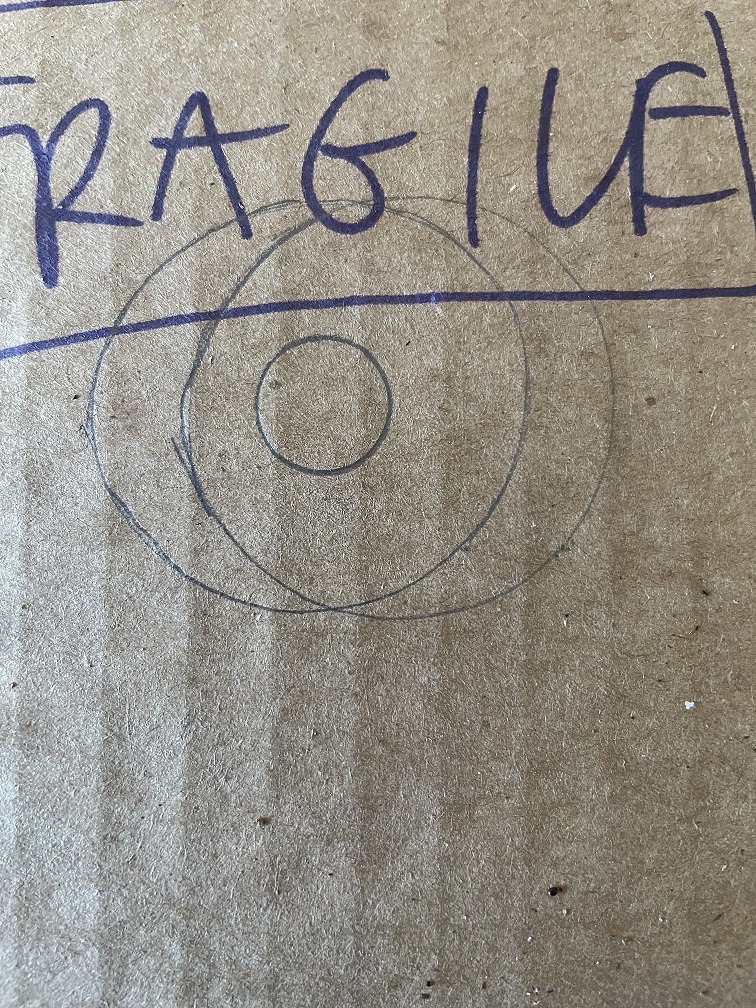
Step 2
Center the tube over the small circle and trace it (this should create a circle within a circle). Next, move the tube over about half an inch and trace another circle. The two overlapping circles should create an oval that will be used for the viewing section.
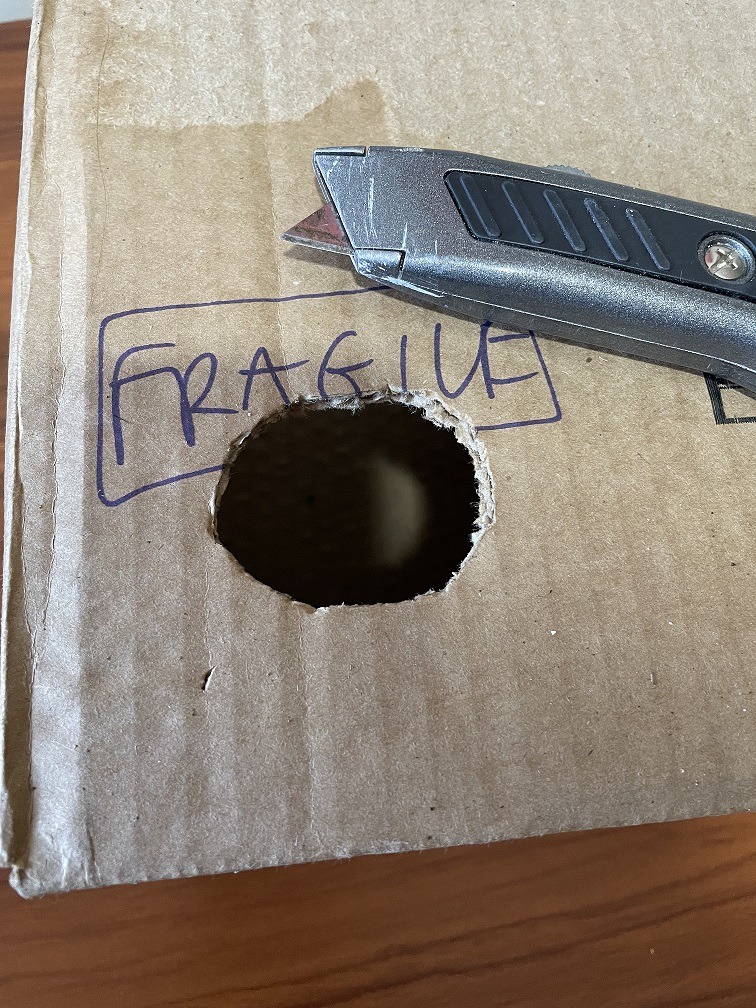
Step 3
Use scissors or an X-acto knife to cut out the oval shape.
Step 4
Next, let’s make the slit. Turn the box to the right (so the oval you just cut out should be on your right side now). On the side of the box that is now in front of you, place the CD near the left edge and draw another small circle to mark the location.
Step 5

Use a ruler to trace a small rectangle, about 2 inches high and half an inch wide. The base of the rectangle should be where your circle is. Use an X-acto knife to cut out your rectangle.
Step 6
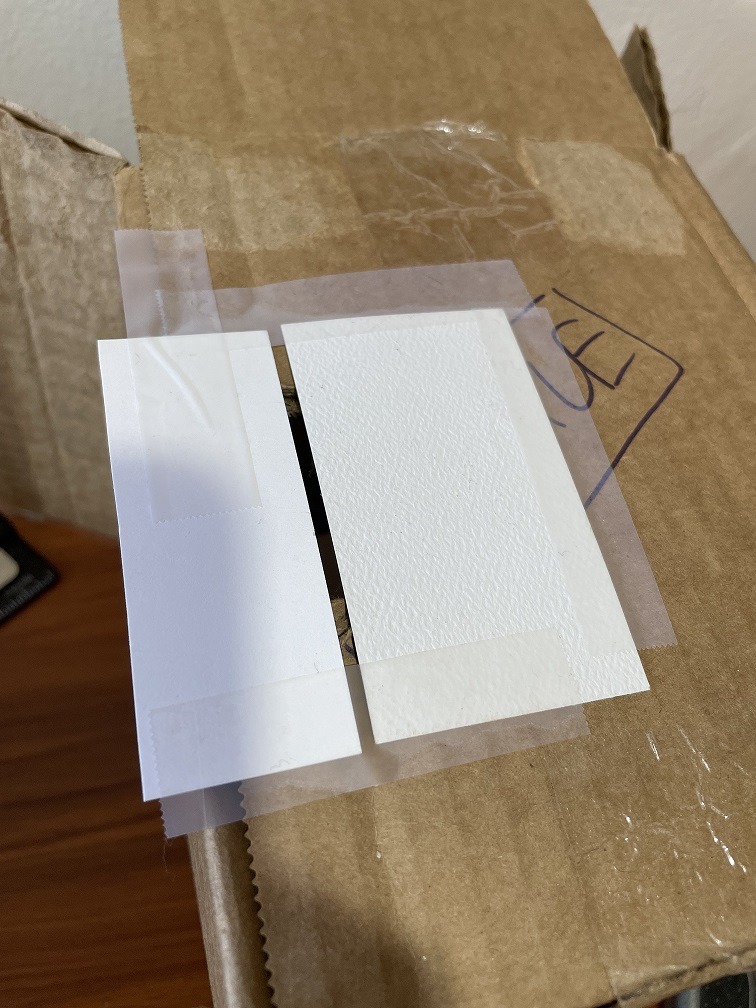
Take the two business cards and place them parallel with each other over the rectangle, leaving a narrow slit in between them.
Step 7
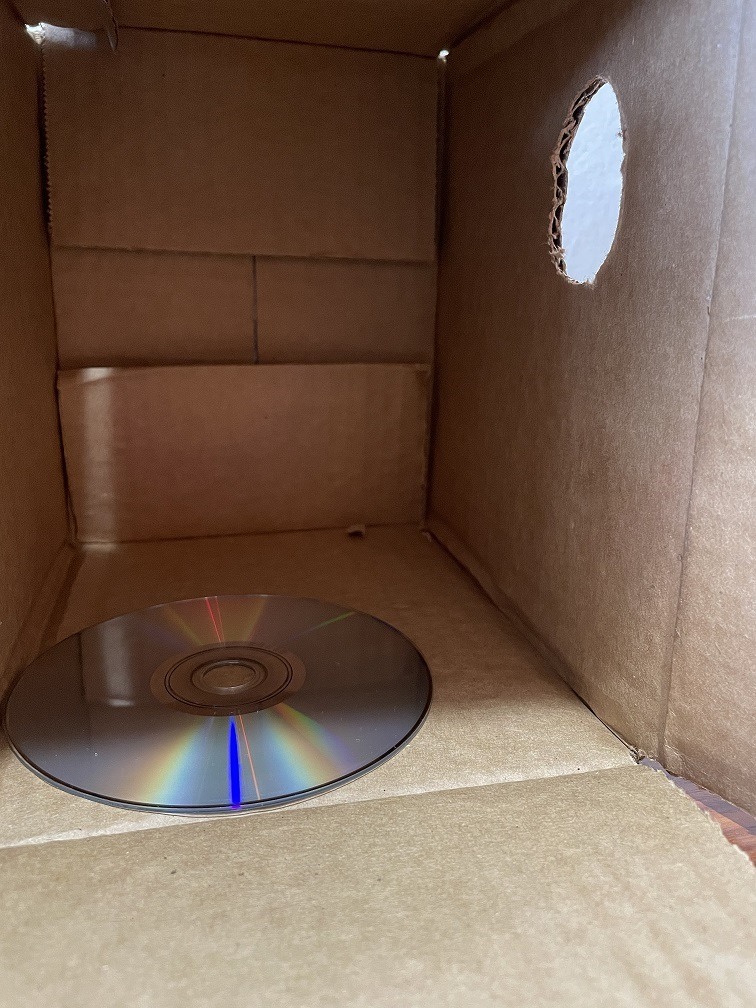
Stand the box upright and place the CD on the inside wall opposite the viewing slit. Make sure the printed side is facing the wall and the shiny side is facing the slit. Make sure the edge of the CD lines up with the slit.
Step 8
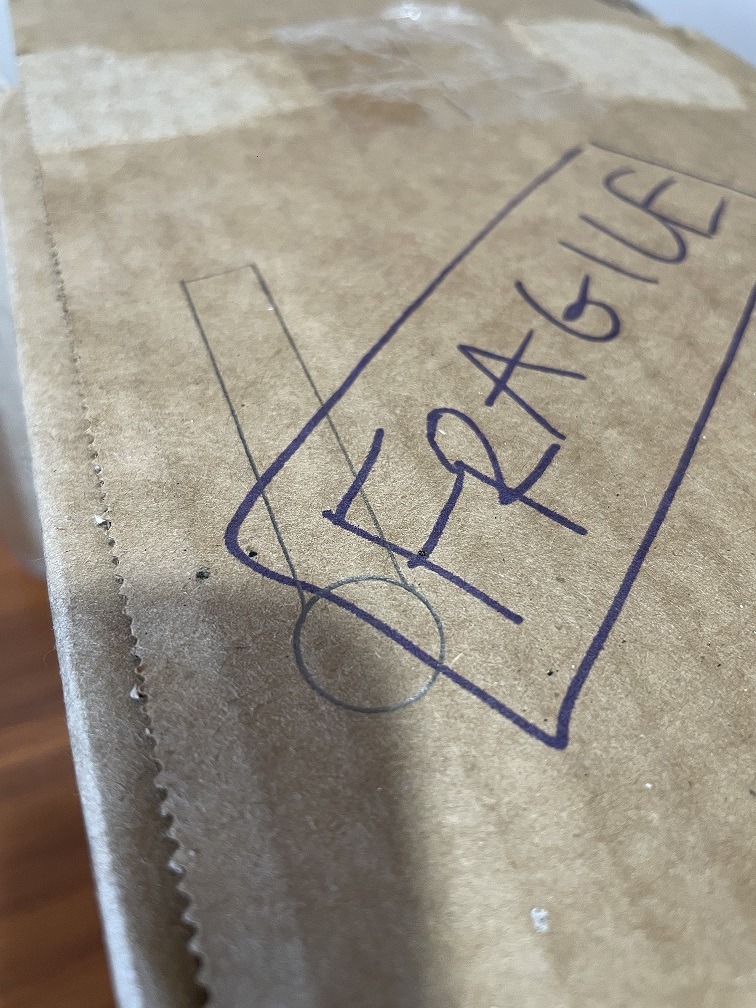
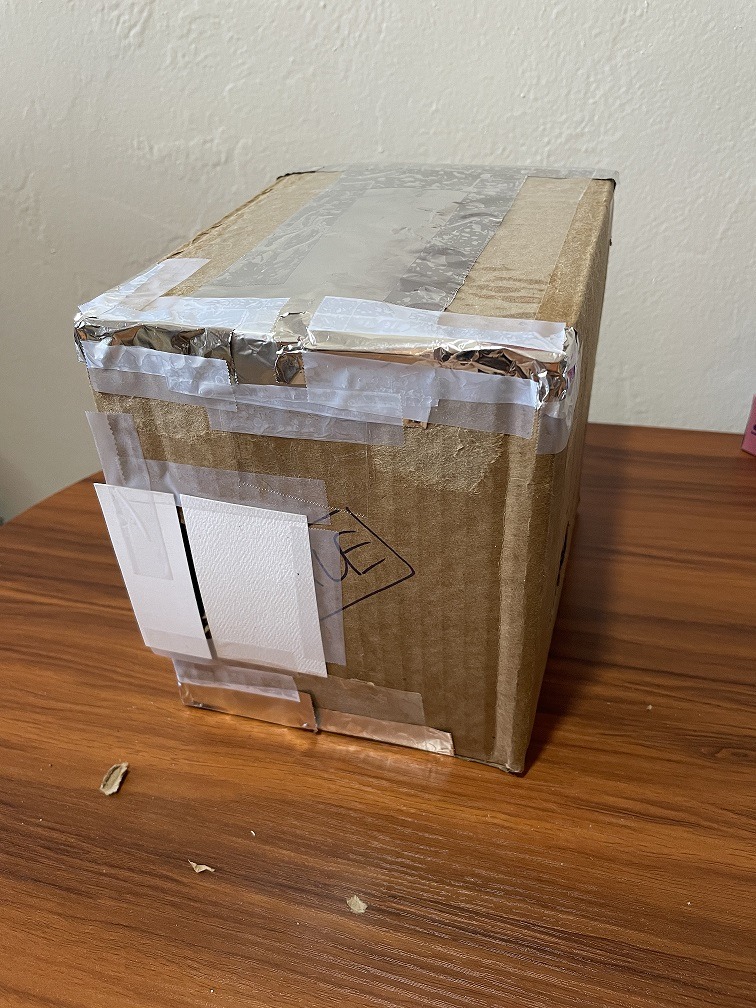
Seal up your box using tape and cover all places where light might get through with aluminum foil (use glue to attach). Leave only the slit and the viewing oval open.
Step 9
Insert the toilet paper tube into the oval at an angle, so that you can peak inside and see the CD. Tape the tube in place and use the aluminum foil to seal up the edges.
Step 10
Aim your spectroscope at various light sources. Some examples of light sources you can try to include natural sunlight*, an incandescent light bulb, a fluorescent light bulb, a candle, or neon lights. *NOTE: Never aim your spectroscope directly at the sun. Simply look at the sunlight bouncing off of a light-colored wall.
Critical Thinking
As you look at different light sources, you should be seeing colored lines in your spectroscope. These are called spectral lines. Write down your observations for each light source and answer the following questions.
- For each light source you observed, did the colors fade or blend into each other?
- Does each light source produce the same group of colors or spectrum, or are they slightly different?
- Do you notice a difference in the spacing between the colored lines in your spectrometer?
- What do the differences in these lines and their spacing represent?
Conclusions:
A diffraction grating spectroscope allows you to see the different wavelengths of light emitted by different sources. When you look through your spectroscope and direct the light through the slit, you should see a rainbow. The pattern, amounts of each color, and spacing between the bands vary as you view different light sources. This is because each has its own unique emission spectrum.

")

Want to learn more about Community Solar?
Our solar specialists can provide a free consultation.
Get Started