Experiment Overview:
Building a Solar Powered Toy Car
Solar energy, created by the sun, is an important source of renewable energy. In fact, most renewable energy comes from the sun either directly or indirectly. Indirectly, the sun’s heat drives the wind which can power a wind turbine. Or, the sun’s light helps plants to grow, which can then be used as organic matter for Biogas. Directly, the renewable energy from the sun can be broken into two basic categories:
- Thermal – where you capture the sun’s heat or
- Photovoltaic (PV) – where you convert the sun’s rays into electricity
When we think of harnessing the sun’s energy through photovoltaic technology, we typically think of solar panels found on the roof of a home or an array that makes up a solar farm. On a much smaller scale, there are solar products like the lights you can purchase from your local hardware store to place in your yard/garden. The solar panels on the roof or solar cells on the garden light are all doing the same thing; they are capturing the sun’s light and converting that energy into electricity – one is just on a much larger scale.
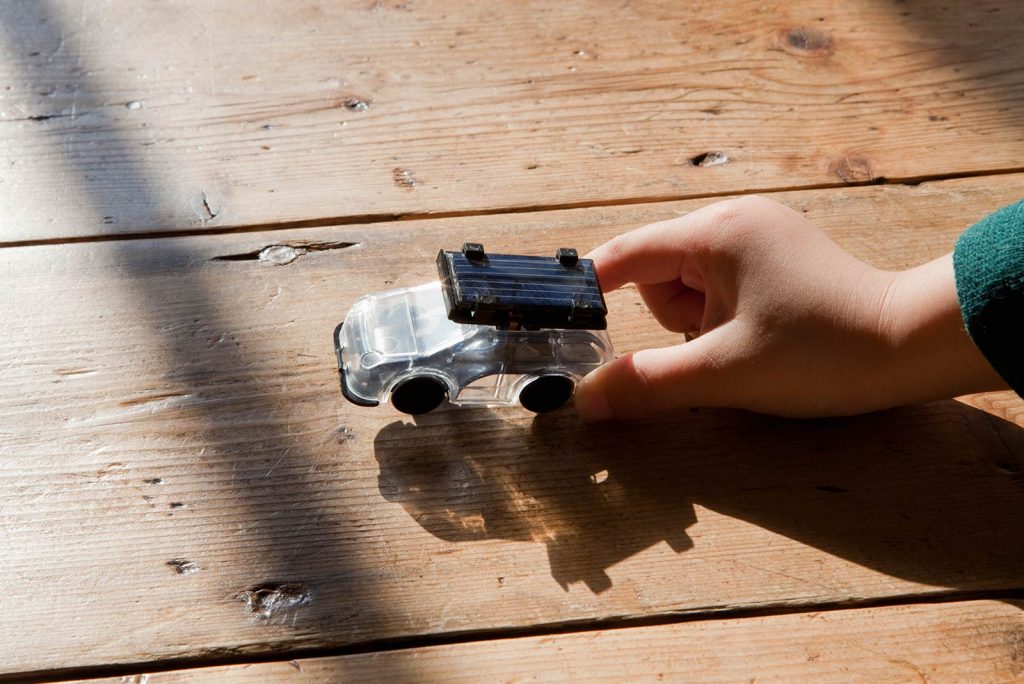
In this project, we are going to create a solar toy car that will run with the help of the sun’s light, using a solar cell and a Direct Current (or DC) motor.
Experiment Materials:
The materials you will need to complete this project are as follows:
- (1) Solar Cell with leads (5 or 6 volts) – available on amazon.com
- (1) DC Motor with leads and small gear – available on amazon.com
- (1) Base for Car (plastic lid, cardboard, or another material that is light and easy to cut)
- (2) Sets of wheels and axles – available on amazon.com
- Larger gear for axel of car
- (1) Long Straws
- (1) Hot Glue Gun
- (1) Thread Spool
- (1) Tape Roll
- (1) Pen/marker
- (1) Ruler
- (1) Pair of Scissors
Experiment Process:
Step 1
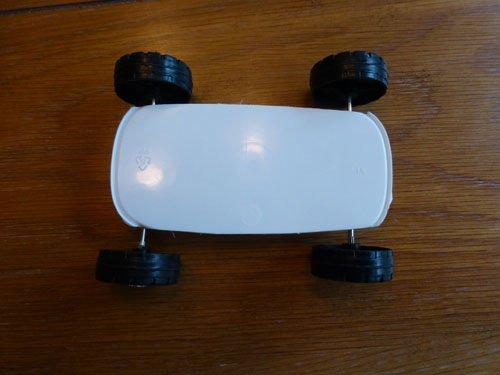
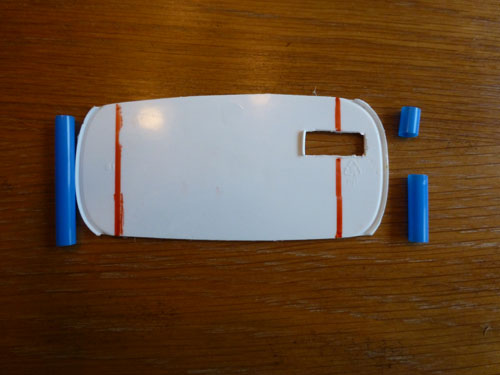
The first step is to cut the base for the solar car. The base has to be narrow enough to allow the wheels to spin but large enough to hold both the motor and solar cell. Make sure to account for these items before you cut! For this project, I used a piece of plastic from a container, but a sturdy piece of cardboard or Styrofoam can work, too.
Note: Place your plastic “car” piece on top of the axle and wheel combination to make sure it fits nicely before moving onto the next step.
Step 2
Decide where you are going to attach your axles and wheels to the base of your car: measure 1/2 inch in on both sides. Draw a line where the axles of your car will be attached.
Step 3
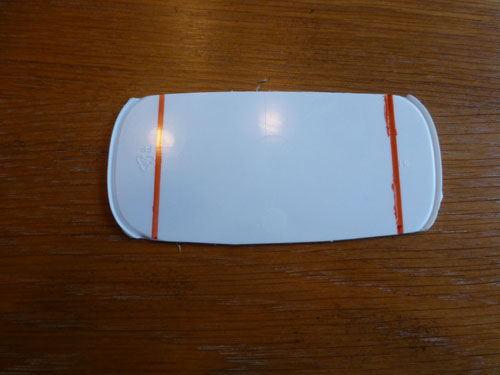
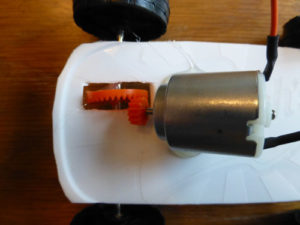
To prepare for the axles, wheels, and gear, cut out a small piece of the “car” base near the front tire. This space will allow the DC motor/small gear to interact with the gear on the axel, and make the front wheel spin when the car is finished. There are a few things to keep in mind before and during the cutting process:
- You may need help cutting because the piece will be rather small. If scissors do not work, you may need a box cutting knife, which means a parent must help.
- You will have to make the rectangle big enough to allow your gear to move freely.
- Notice in the picture how the rectangular cut is slightly larger than the gear.
Step 4
Cut three pieces of straw to fit on the bottom of the car’s base. This step will allow the axles of the wheels to spin. Remember, you will have to cut your straws to fit your base. In this example, we made three different cuts:
- One (1) to fit the back wheel
- One (1) to fit the longer part of the front
- One (1) tiny piece to fit on the other side of my gear (the rectangle open cut)
Hot glue the straws into place on the axle lines. You may need help from a parent for this step.
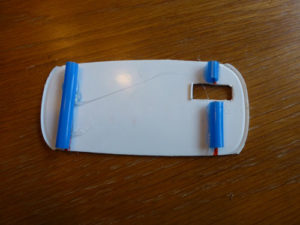
Note- if we were to simply hot glue the axles to the bottom of the base, the wheels would not be able to move. The straws allow the axles of the wheels to stay attached and still move freely.
Step 5
Now, place the wheels and axles on the car. For the back, simply place the axle through the straw and attach the wheels to both sides. On the front of the car, make sure to place the gear in the rectangular cut out while you place the axle on the car.
Step 6
Before moving on, make sure that the wheels can freely move and everything is aligned. If not, make adjustments to your base, straws, or wheels to remedy the problem.
Step 7
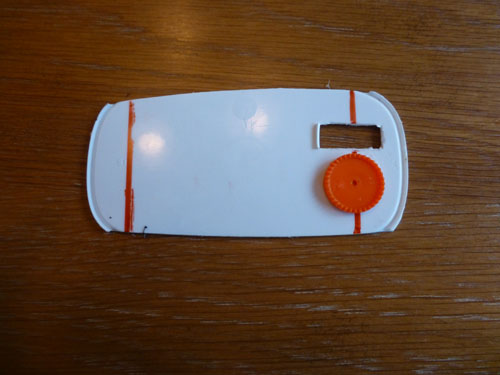
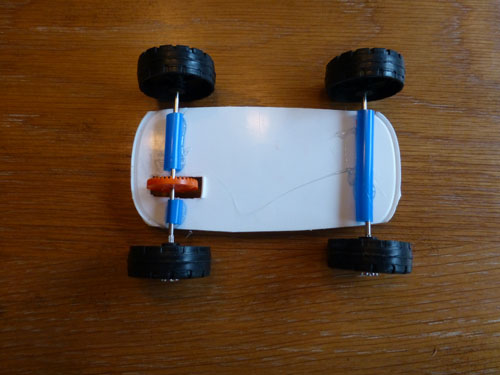
Now that you’ve confirmed everything is working nicely, with the help from a parent, hot glue your large gear into place and allow it to dry.
Step 8
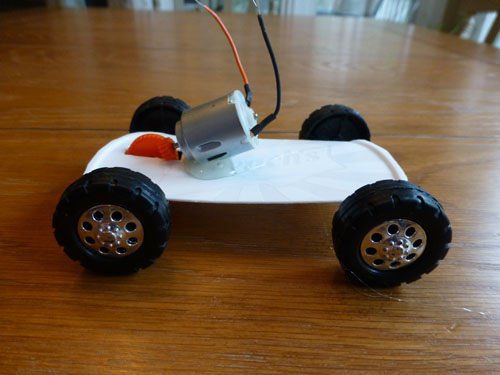
Also with a parent, hot glue the motor onto the base of the car so that the end will engage with the gear! As you can see from the picture, we had to slightly angle the motor so that it would engage with the gear.
Important Note: After taking our car outside on a sunny day, we noticed that the gears did not fully engage. We shortened the front axle to help with this problem and it was quickly fixed. Remember, if the gear combination is too tight or too loose, the car will not function properly.
Step 9
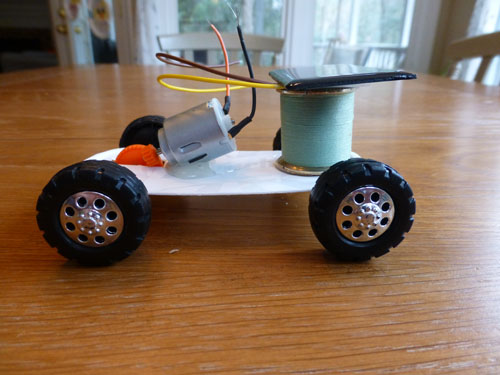
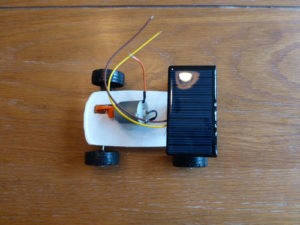
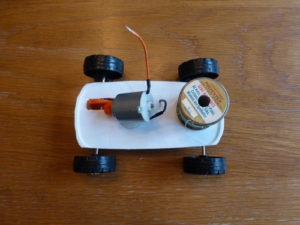
Next, attach the solar cell to the base of the solar car. Due to the size of the cell and the overall size of the car, we had to create a small table for the solar cell to sit on. We used a thread spool to elevate the solar cell. We taped the solar cell to the thread spool so that it could be easily removed or tilted if needed.
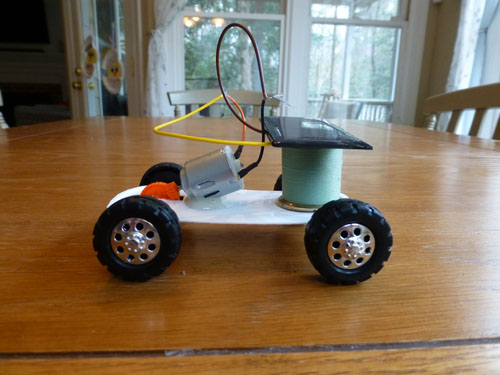
Step 10
Attach the leads from the solar cell to the leads of the DC motor to create a complete circuit.

Step 11
On a sunny day, head outdoors to a safe spot and allow the solar panel to capture power from the sun and begin to move the toy car!
Conclusions:
In this project, we created a toy car that was powered by the sun (a renewable energy source). To better understand how this design functioned, here is a very basic break down on how a solar panel works:
A solar panel is comprised of smaller units called solar cells. The solar cells, or photovoltaic cells (“photo” meaning light and “voltaic” meaning electricity), generate a flow of electricity. For our toy solar car, we used a direct current motor to move the unit, because the solar panel created a Direct Current flow of electricity. It is important to note that a solar panel system used to generate electricity for a home or for a power grid would require an inverter to change the direct current to an alternating current.
Study/Extension Questions
- How does a solar cell work?
- What else could you potentially power with your 5-6-volt solar cell?
- How else can solar power be used in your home?
Extension:
Variations to Experiment
- Try altering the power source: Use a 2-volt solar cell and see if the solar power is enough to make the car move.

")

Want to learn more about Community Solar?
Our solar specialists can provide a free consultation.
Get Started