Parental Note: This experiment is geared toward ages 8 and up to be completed independently with some help from an adult. The project may require some adult support when cutting materials.
Note: This experiment will take roughly three weeks to complete. Prior to the experiment (1-2 days), collect organic food matter (orange peels, excess fruit, egg shells, etc.). Place the materials in a plastic bag and then in the refrigerator to be used for the experiment.
Experiment Overview:
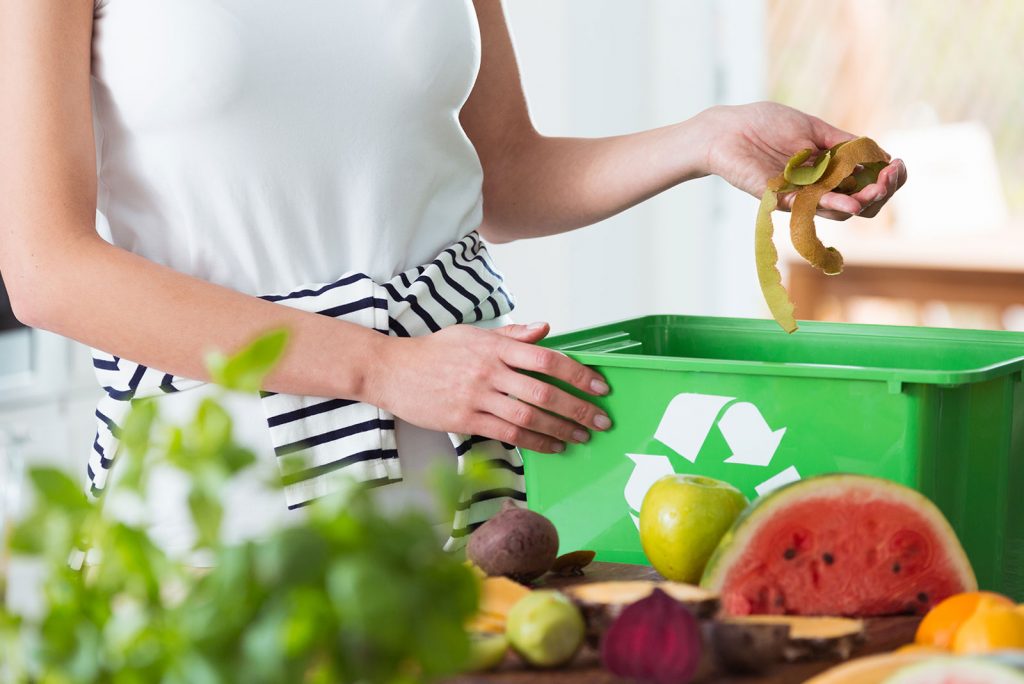
Take a minute to think about the food you throw away each day. The amount of food waste that ends up in the trash after breakfast, lunch, dinner and snack time. Now, take that idea and think about how much food waste occurs in the United States each day! On average, Americans waste about a pound of food each day per person. That is one pound of food waste per person per day. With roughly 300 million people living in the United States, the amount of food wasted each day is huge.
1 (lb) of food multiplied by the U.S population 326,766,748 = A TON OF WASTE (163,383 tons to be exact)
The good thing about this food waste problem is that there is a rather simple solution called composting. Composting is the natural process of decomposition/recycling organic materials into rich soil. These organic scraps (vegetable peels, fruit waste, plant clippings, and grass cuttings) turn into a material called compost. The compost is rich in nutrients and wonderful for house plants, gardens, and other outdoor plants. There are also many other benefits to composting:
- Reducing the waste in landfills, which directly links to the idea of “reduce, reuse, and recycle.”
- Reduction of methane emissions from landfills which lowers our carbon footprint.
- Reduces the need for commercial soil fertilizers (which also helps with water pollution).
- Helps control soil erosion.
Composting happens naturally in forests when leaves fall and form a mulch-like layer that protects the soil. The leaves decay and decompose over time to create nutrients that feed the forest plants. This natural process can be replicated through the use of composting bins that can be placed in your own backyard. In this experiment, we are going to create a small composting bottle to visually show the composting process and better show how composting can reduce food waste and help the environment.
Experiment Materials:
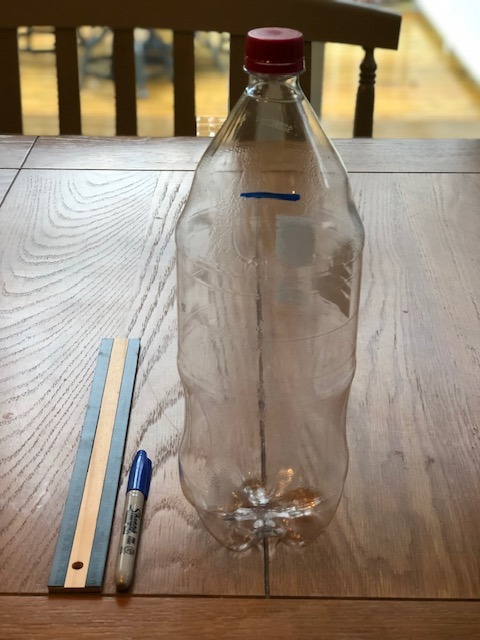
- Clear plastic bottle (pop bottle)
- 1 cup of fruit, vegetables, and other organic food waste from the kitchen
- 1 cup of leaves or grass clippings
- 1 cup of shredded paper
- 5 cups of potting soil
- 1 or 2 cups of water
- Tape
- Scissors or sharp object
- Permanent marker
- 3 paper plates
- 1 large bowl
- 1 measuring cup
- 1 spoon or cup
Experiment Process:
Step 1
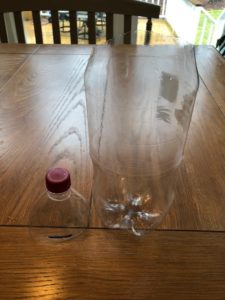
Measure three inches down from the top of the clear plastic pop bottle and draw a line using a marker. With help from an adult, cut the pop bottle (on the line) so that the top can be removed. Once cut, clean the plastic pop bottle.

Step 2
Organize the materials to create the composting bottle. Place the organic food items, shredded paper, and leaves on separate plates. Fill a container with roughly five cups of potting soil.
Step 3
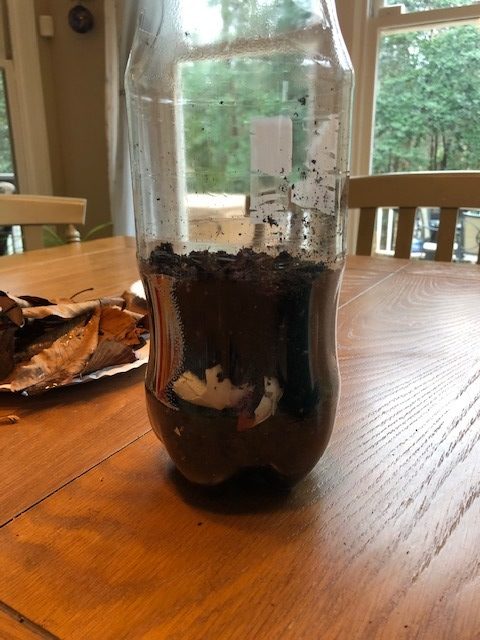
Layer the soil, leaves, paper and organic materials in the clear plastic bottle.
Layer the items as follows:
- A layer of soil
- A thin layer of organic food matter
- Another layer of soil
- A thin layer of shredded paper
- Another layer of soil
- A thin layer of leaves and/or grass clippings
- A layer of soil
Step 4
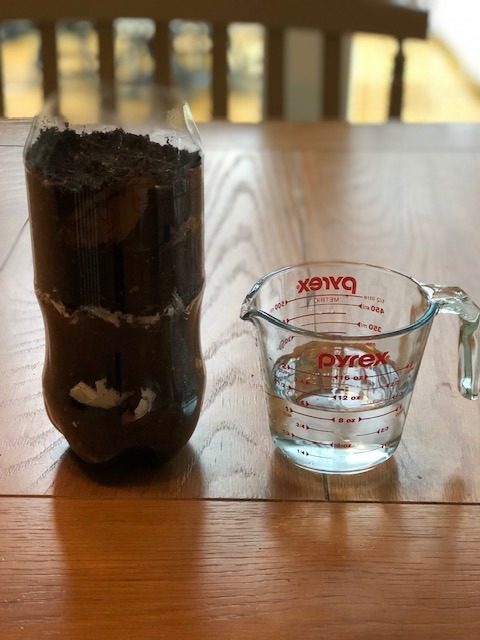
Moisten the soil with one to two cups of water. Make sure that the water saturates each layer of the composting bottle all the way down to the bottom of the bottle.
Step 5
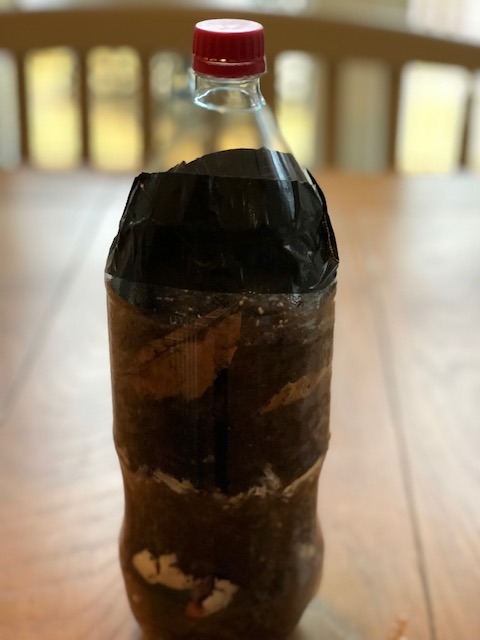
Place the top of the bottle back on the layered base and tape the bottle closed. The bottle must be airtight for the composting to take place.
Step 6
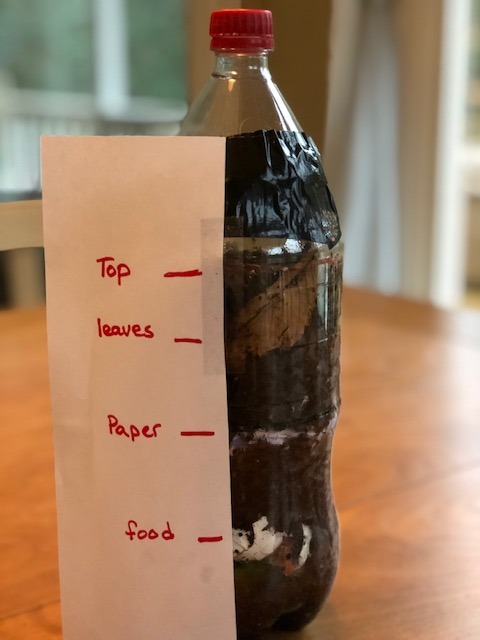
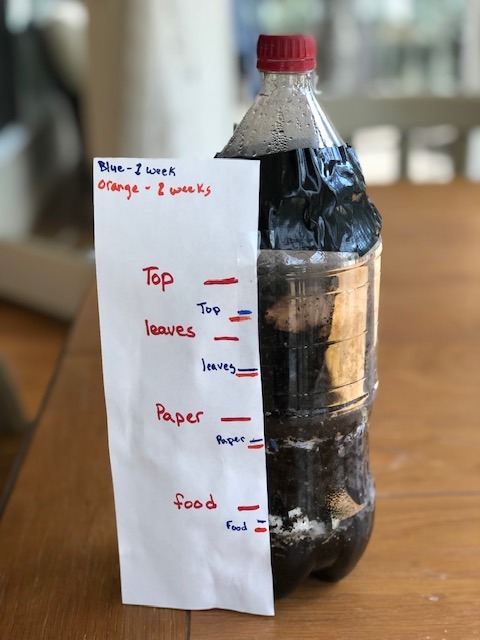
Using a permanent marker, label each layer of the composting bottle and also mark the top of the soil level.
Note: We used a piece of paper to label the bottle, but feel free to place the labels directly on the bottle.
Step 7
Place the composting bottle in a sunny location (direct sunlight is needed for most of the day).
Note: If it is a beautiful, warm day, place the composting bottle outside in the sun.
Step 8
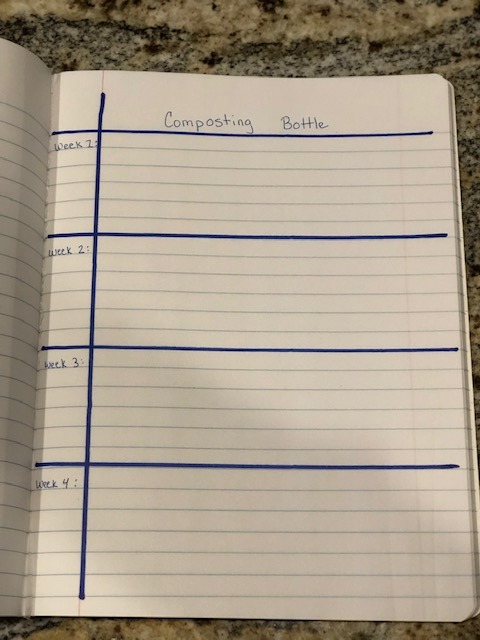
Once a week, observe the composting bottle and take scientific notes to track the decomposing levels. Make observations for three weeks.
Note: If the soil begins to dry, add water to moisten.
Step 9
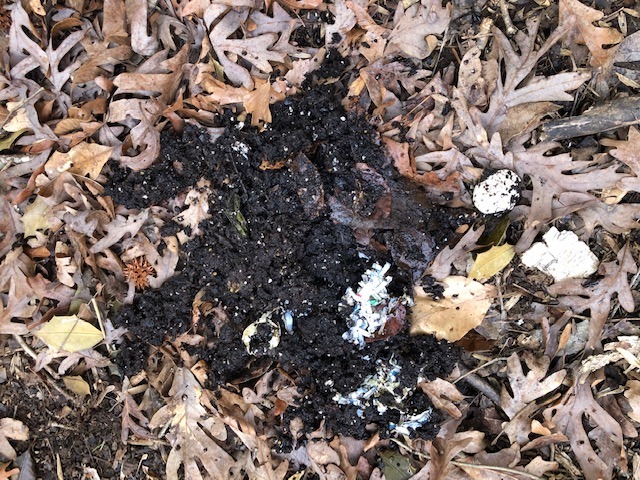
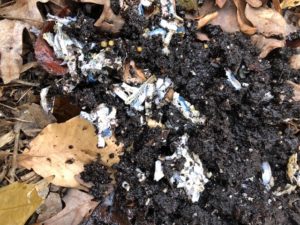
After three weeks of observation and note-taking, open the bottle and examine the compost. Dump the contents out and examine the soil. Answer the following questions:
- What do you see in the soil?
- Can you identify any of the materials placed in the bottle three weeks ago?
Results from Experiment - Week 1
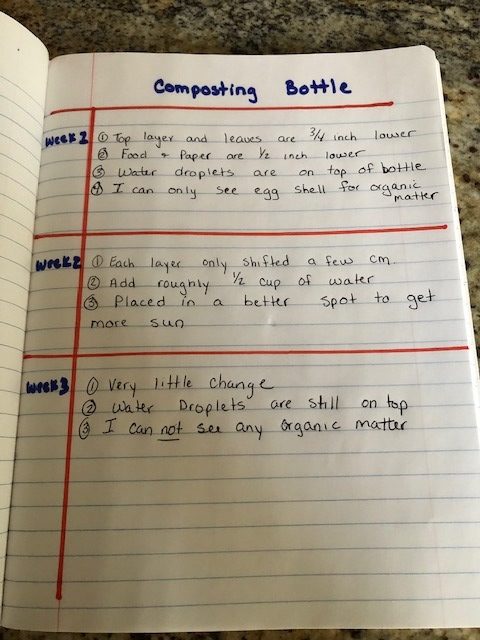
After one week of decomposition, the layers have lessened in size. There was a shift of roughly ¾ of an inch for the top layer and leaves. The food and paper shifted/compacted about ½ of an inch. There were water droplets on the top of the bottle and the only organic food matter that was visible was the eggshell.
Results from Experiment - Week 2
It seems like the layers have only compacted slightly (a few centimeters). I added ½ cup of water to the composting bottle and moved it to a sunnier spot.
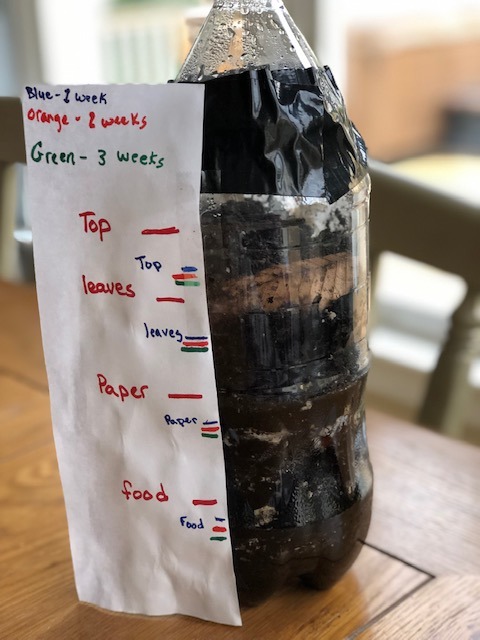
Results from Experiment - Week 3
Once again there was very little visual change to the composting bottle layers. The water droplets were still visible on the top of the plastic bottle.
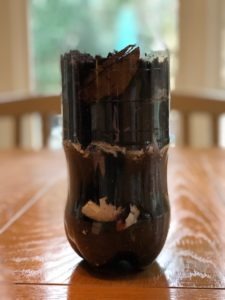
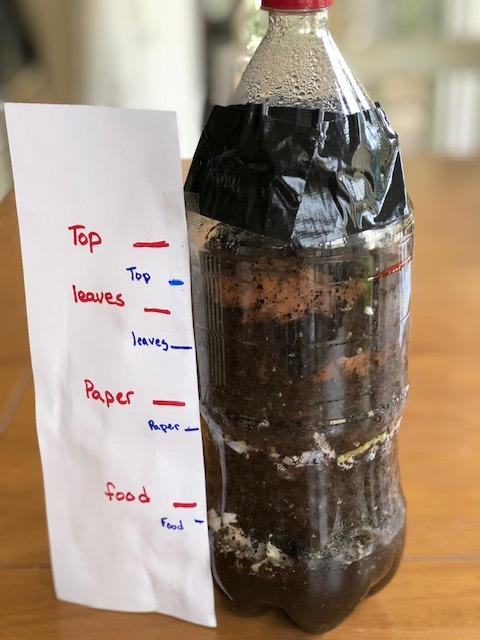
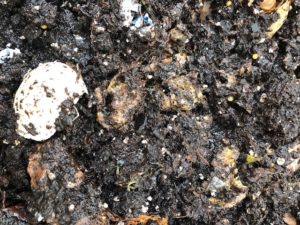
Inside the Bottle
When the contents of the bottle were dumped out, it was easy to see that the organic matter had started to decompose. The banana peel was almost unrecognizable and had turned into a slimy brown clump. The green pepper was completely decomposed with only the eggshell visible. The paper was beginning to break down; when touched, it would break apart into a mushy film; (paper is wood pulp and wood is organic matter).
Conclusions:
Now that we have the results from the experiment, let’s look at composting in a much more scientific manner. During the composting process, different microorganisms (bacteria, fungi, protozoa) decompose the organic matter. The microorganisms break down the organic food items to produce a simpler substance called compost. It is important to note that composting needs oxygen, heat and water to be successful. These three elements help the microorganisms to multiply and survive. In this experiment, we added two of the main ingredients needed for composting:
- Water – We added one to two cups of water at the beginning of the experiment
- Heat – We placed the composting bottle in direct sunlight (remember- the sun is a renewable resource) and allowed the thermal heat to decompose the organic materials.
Note: Air was not added to this experiment because it would have hindered our ability to track the layers and visually see the decomposition. Aeration is the process of adding air to a composting bin through mixing and stirring.
While composting is a great way to reduce the amount of food waste sent to local landfills, it can only be used with organic food waste. Composting alone will not eliminate all food waste in the United States, however, it will help our planet by reducing methane gas emissions and lessen the number of materials sent to landfills. Ultimately, composting is a great way to create a healthier world while also decreasing our carbon footprint. Can you think of other ways to help reduce landfill waste? Examine ways to “reduce, reuse, and recycle” some of the items that end up in the trashcan after a long day of eating and snacking.
Extension:
Variations to Experiment:
Parents, feel free to try the following variations to the experiment:
- Vary the organic materials placed in the composting bottle. Do different organic food materials decompose at different rates?
- Does a composting bottle work better during warmer months? Create a composting container in the winter or cooler months and one during the summer. Are the results the same?
Study Questions:
- What is composting?
- How do you create compost?
- What material/items are needed to create the perfect composting environment?
- Are there other ways to create a composting bin?
- What materials would you need to create your own larger (garden style) composting bin?


")
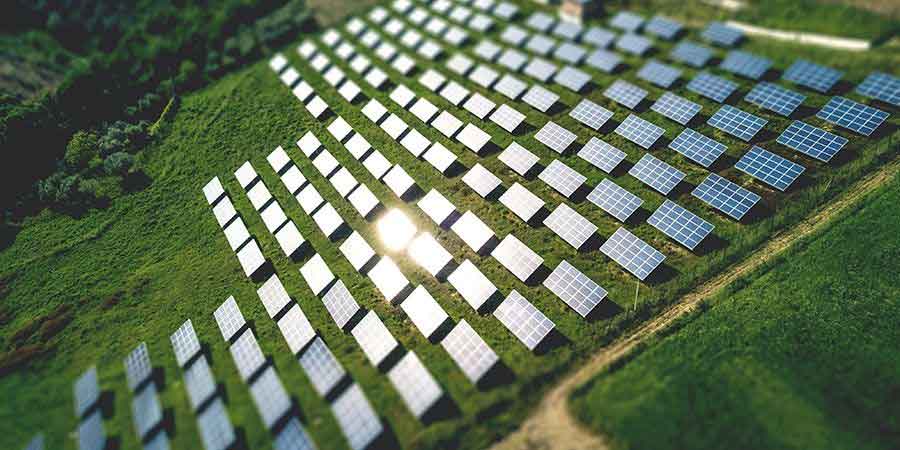
Want to learn more about Community Solar?
Our solar specialists can provide a free consultation.
Get Started