Parental Note: This experiment is geared towards ages 9 and up. The project may require some parental help when dealing with the cutting of certain objects (i.e- spoons, Styrofoam wheel) and also the use of a hot glue gun.
Experiment Overview:
Thanks to the water cycle, water is considered one of our planet’s renewable resources, similarly to the sun. And like the sun, water can be utilized to generate power. In fact, hydropower was one of the first sources of energy used to create electricity. Hydropower works by using flowing water to move a turbine. At home, you can learn how to use water to move an object by creating a water wheel!
As water flows and spins a water wheel, the pace of its spin and the kinetic energy is converted into electricity. If you have ever seen a water wheel, you know that they usually consist of two large wooden or metal wheels that have paddles or buckets arranged along the outside edge or rim of the wheels. The force of the water pushes the wheel and therefore creates movement along the axle. The movement of the wheel turns the axle located in the center of the water wheel (much like the wind turbine from a previous experiment) and transfers the energy to a drive belt or a system of gears that operates an additional system. The additional system usually does some sort of work such as: grinding flour for baking, grinding pulp to make paper, preparing fibers to make clothes.
It is important to note that while water wheels are not commonly used in our current, modern way of life, the science behind water wheels is used in hydroelectric dams. With the basic knowledge behind the water wheel and how it works, you can create your own at home.
Experiment Materials:
- 8-10 plastic spoons
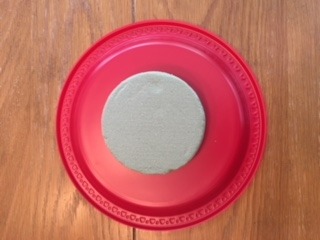
- 1 Styrofoam disk or a dry foam disk (Click here for an example)
- 2 plastic plates
- 1 Dowel rod or wooden skewer
- 1 medium sized bucket
- Scissors
- Ruler
- Marker
- Safety glasses/goggles
- Optional:
- 12-inch string
- Tape
- Paper clip
Experiment Process:
Step 1
First, prepare the Styrofoam or dry foam disk to be the center of the water wheel. To do this, cut the foam to be about the same width as your spoons. You are also going to need to make sure the disk is smaller than your plastic plates. If the Styrofoam/foam disk is already the correct width and size, feel free to skip this step.
Note: Kids may need help from an adult when cutting the disk.
Step 2
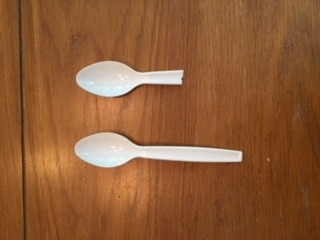
Next, prepare the 8-10 plastic spoons to become the buckets/paddles that move the axle. Cut each spoon so that it can be placed inside the foam. Try to cut each spoon about the same size.
- Kids WILL need help from an adult on this step because the spoons can be tricky to cut.
- Kids WILL also need to put on safety goggles/glasses in case a piece of the spoon goes flying into the air. Stay safe while doing science!

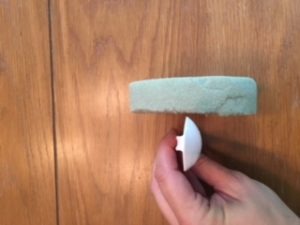
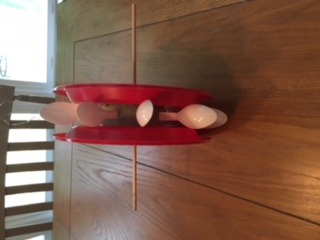
Step 3
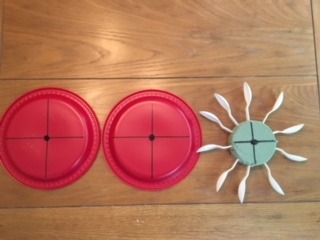
Push the spoons into the foam disk. Make sure all of the spoons are facing the same direction and are evenly spaced around the disk. Use the picture below as a reference.
Note: If the spoons are not staying firmly in the disk, hot glue them in place. You may need help from an adult to hot glue the spoons.
Step 4
The next step is to make holes for the dowel rod/wooden skewer to go through the discs so the wheel can spin. Find the center of the 2 plastic plates and the foam disk. Use a ruler and marker to draw lines connecting the center of the plate. See the picture below.
After you find the centers of each object, carefully cut a small hole in each of the items. The hole must be large enough for the dowel rod to go through easily, but small enough so that it fits snuggly.
Note: Kids may need adult help cutting the holes into the plates and foam disk.
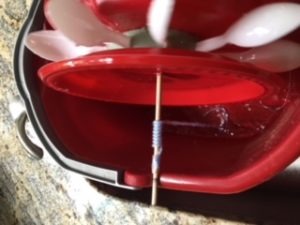
Step 5
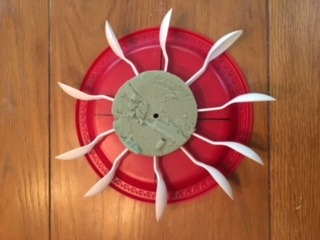
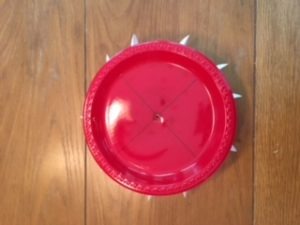
Before you put the dowel rod into the water wheel, secure all of the working parts. With a hot glue gun, hot glue your plates to the sides of your foam disk. Make sure the holes align so that in the next step, you can insert the axle. Make sure your plates are completely dry before you move onto the next step.
Note: Parental help may be needed with this step due to the use of a hot glue gun.

Step 6
In this step, place the dowel rod or skewer through the center of your wheel. When the rod is in place, make sure it fits snuggly.

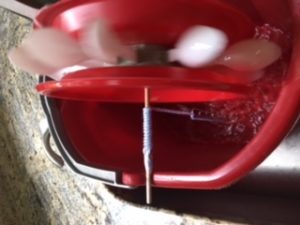
Step 7
Now, you are ready to test out the water wheel! Place your wheel in a bucket or sink where you can access water. Slowly turn on the water and watch the wheel spin. Note: the dowel rod needs to be placed so that it can be free standing and not fall over when the water is turned on. If your sink is too large, use a suitable bucket.
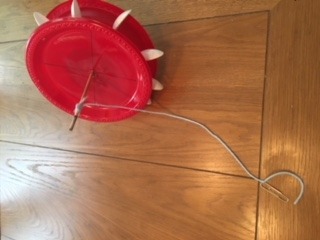
Step 8 - Optional
If you would like to better understand how a water wheel creates and transfers energy, tie and tape a piece of string to the end of the axle, and then attach a paper clip to the other end. When the water moves the wheel, it will begin to spin the yarn and paperclip towards the top of the bucket or top of the sink. Most water wheels were used to power a separate system. (In this extension, the water wheel was used to pull up / move a paper clip) .
Conclusions:
Now that you’re done, let’s review the main components of a water wheel.
- The blades/buckets of the wheel must be created in a manner so that they can catch the water and create movement.
- The water wheel must have an axle that is able to rotate/move to generate energy.
- The axle is usually attached to another system to harness the energy created.
Even though water wheels are not commonly used today, because it was a simple, easily constructed machine, it helped build the foundations of harnessing water to generate movement or energy. Now that you know so much about water wheels and the main parts and workings, do you think you could create a different version? Perhaps one that is bigger and powers/moves a different object? You can research different water wheels throughout history and use your knowledge to try and create more of your own.
Extension:
Variations to the Project
Parents, feel free to try the following variations to this project:
- Try using different materials to create the water wheel. Will it work by just using the foam disk, axle, and the spoons?
- When turning your water wheel with water, try to vary the speed/force. Make the correlation between the force/amount of water and the speed of the water wheel.
- You can also vary the items used as the bucket/paddle. In this experiment we used spoons, but what if we used popsicle sticks or plastic cups?
Study/Extension Questions:
- What are the main components of a water wheel?
- How does the wheel generate energy?
- What is the history of the Water Wheel? How far back in history can we see the Water Wheel?
- Why do you think we have stopped using water wheels?
- What is a hydroelectric dam and how does it work? How is it like a water wheel?

")

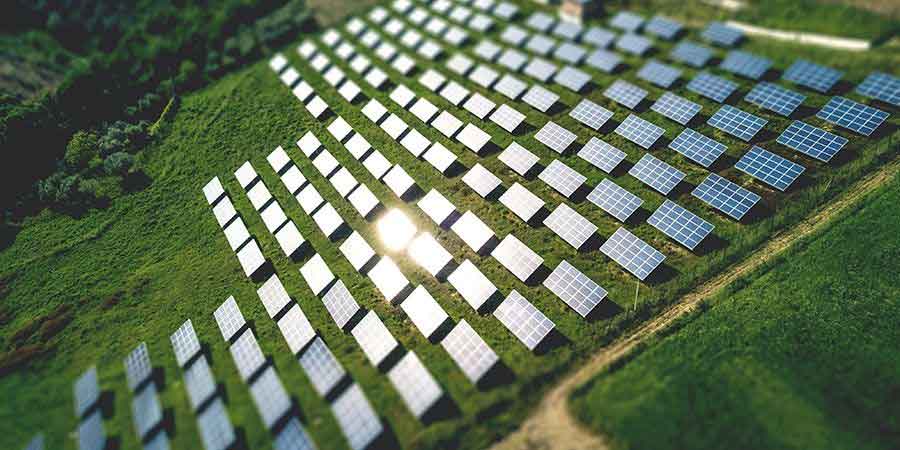
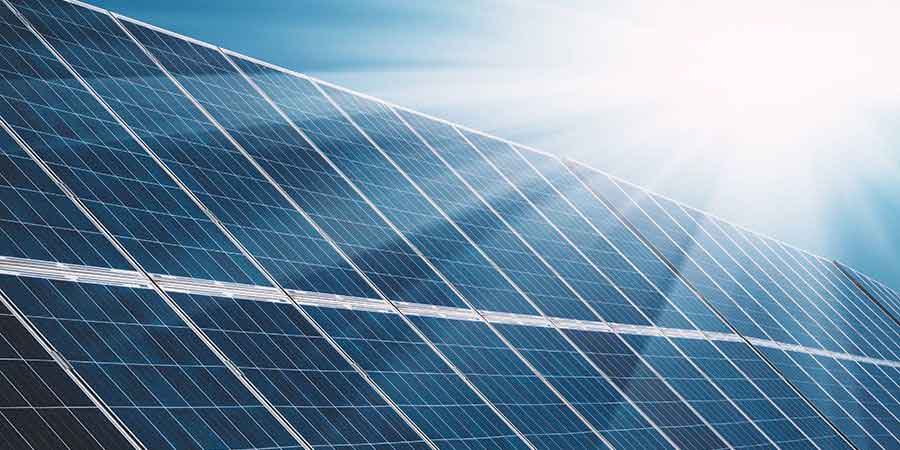
Want to learn more about Community Solar?
Our solar specialists can provide a free consultation.
Get Started